Beginner’s Guide: Send Automated Order Confirmation Emails From Your BTCPay Store

- Setup: BTCPay Server hosted on Bitcoin Aruba with Gmail email integration
Setup: BTCPay Server hosted on Bitcoin Aruba with Gmail email integration
Keep in Mind
- BTCPay Server: free, open-source bitcoin project, not a “company”
- Bitcoin Aruba: independent BTCPay Server instance
- Gmail
- Google frequently updates its UI so differences may occur over time
- App Password: 16-digit passcode generated by Google giving an app full access to your Google Account
- 2-Step Verification: required to use App Passwords
What You’ll Need
- BTCPay Server Store and Point of Sale
- Google Account with 2FA enabled
- Phone number to receive Google verification code (if applicable)
Decisions to Make
- Gmail account: Use an existing account or create a new one for sending/receiving order confirmation emails
- 2FA method:
- Google prompt to a device
- Authenticator App
- Phone number
(Passkeys or security keys alone will not work for this setup)
- Customer emails: Emails can be customized with dynamic fields (e.g., customer name, order number, product info, etc).
Get Started
⚠️ Jump to Step 4 if you already have Gmail with 2FA enabled
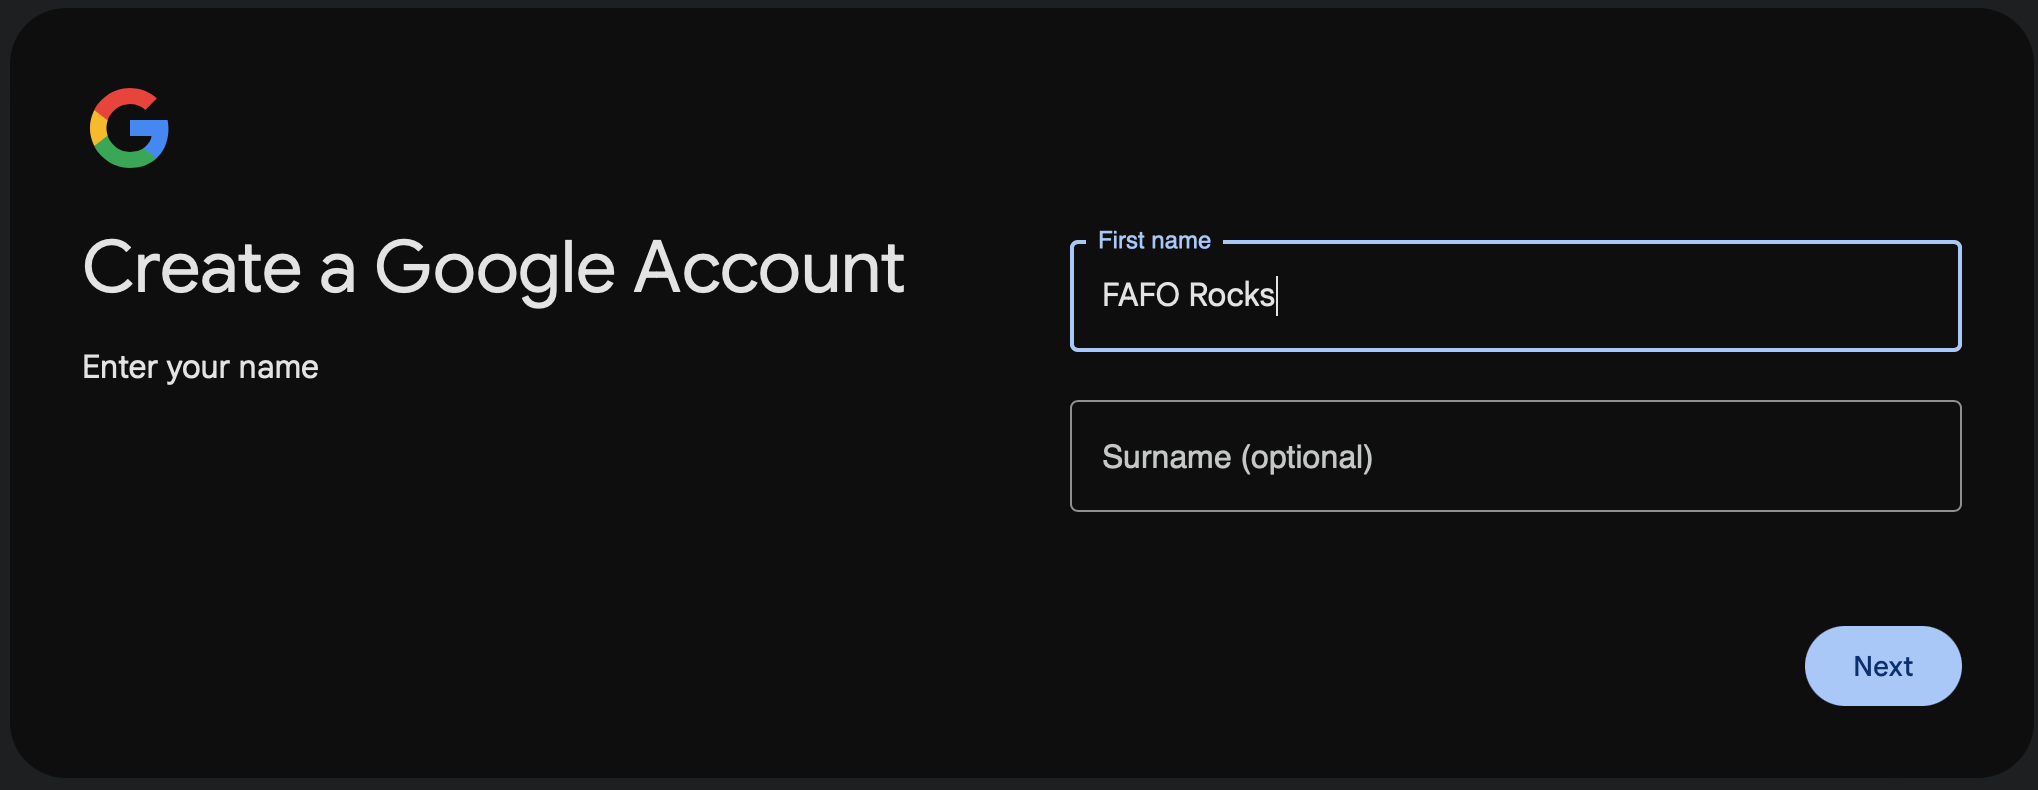
1. Create a New Google Account
- Go to Google Account Signup
- Enter:
- Name (last name optional)
- Date of Birth (≥13 years old)
- Gender (Select Male or Female)
- Select Create your own Gmail address
- Enter a username (this becomes your Gmail address, e.g.,
faforocks@gmail.com) - Create a strong password
- Add phone number for verification → verify when prompted
- Skip additional prompts
Review your account info
- Click Next
Choose your settings
- Select Choose in 1 step: Make a single choice that applies to all
- Click Next
Scroll to the bottom
- Click Reject all
🔸 You should see
Web & App Activity - Off YouTube History - Off Personalized ads - Off
- Click Confirm
- Click Agree to the terms
✅ Google account created successfully
Important
⚠️ A BTCPay Server admin could potentially access your Google account. Creating a fresh account ensures you haven’t inadvertently shared more than intended.
2. Enable 2-Step Verification (2FA)
- From Google Account sidebar, select Security
- Scroll to How you sign in to Google
- Click 2-Step Verification and select a second sign-in option
Note
ℹ️ There are 4 ways to add 2FA (but security keys alone will not work for this setup):
- Passkeys and security keys.
- A Google prompt to a device.
- Authenticator App
- Phone number
-
Click: Turn on 2-Step Verification
-
Click Done
✅ 2-Step Verification turned on successfully
3. Save Backup Codes (Optional but Recommended)
- Click Backup codes
Note
ℹ️ You have the option to download and print the codes. You can also write them down or copy and paste them securely.
✅ Google backup codes saved successfully
Important
⚠️ Don’t share these backup codes. Save them securely. Should you ever have trouble accessing your Google account these codes can be used to log in.
4. Create a Google App Password
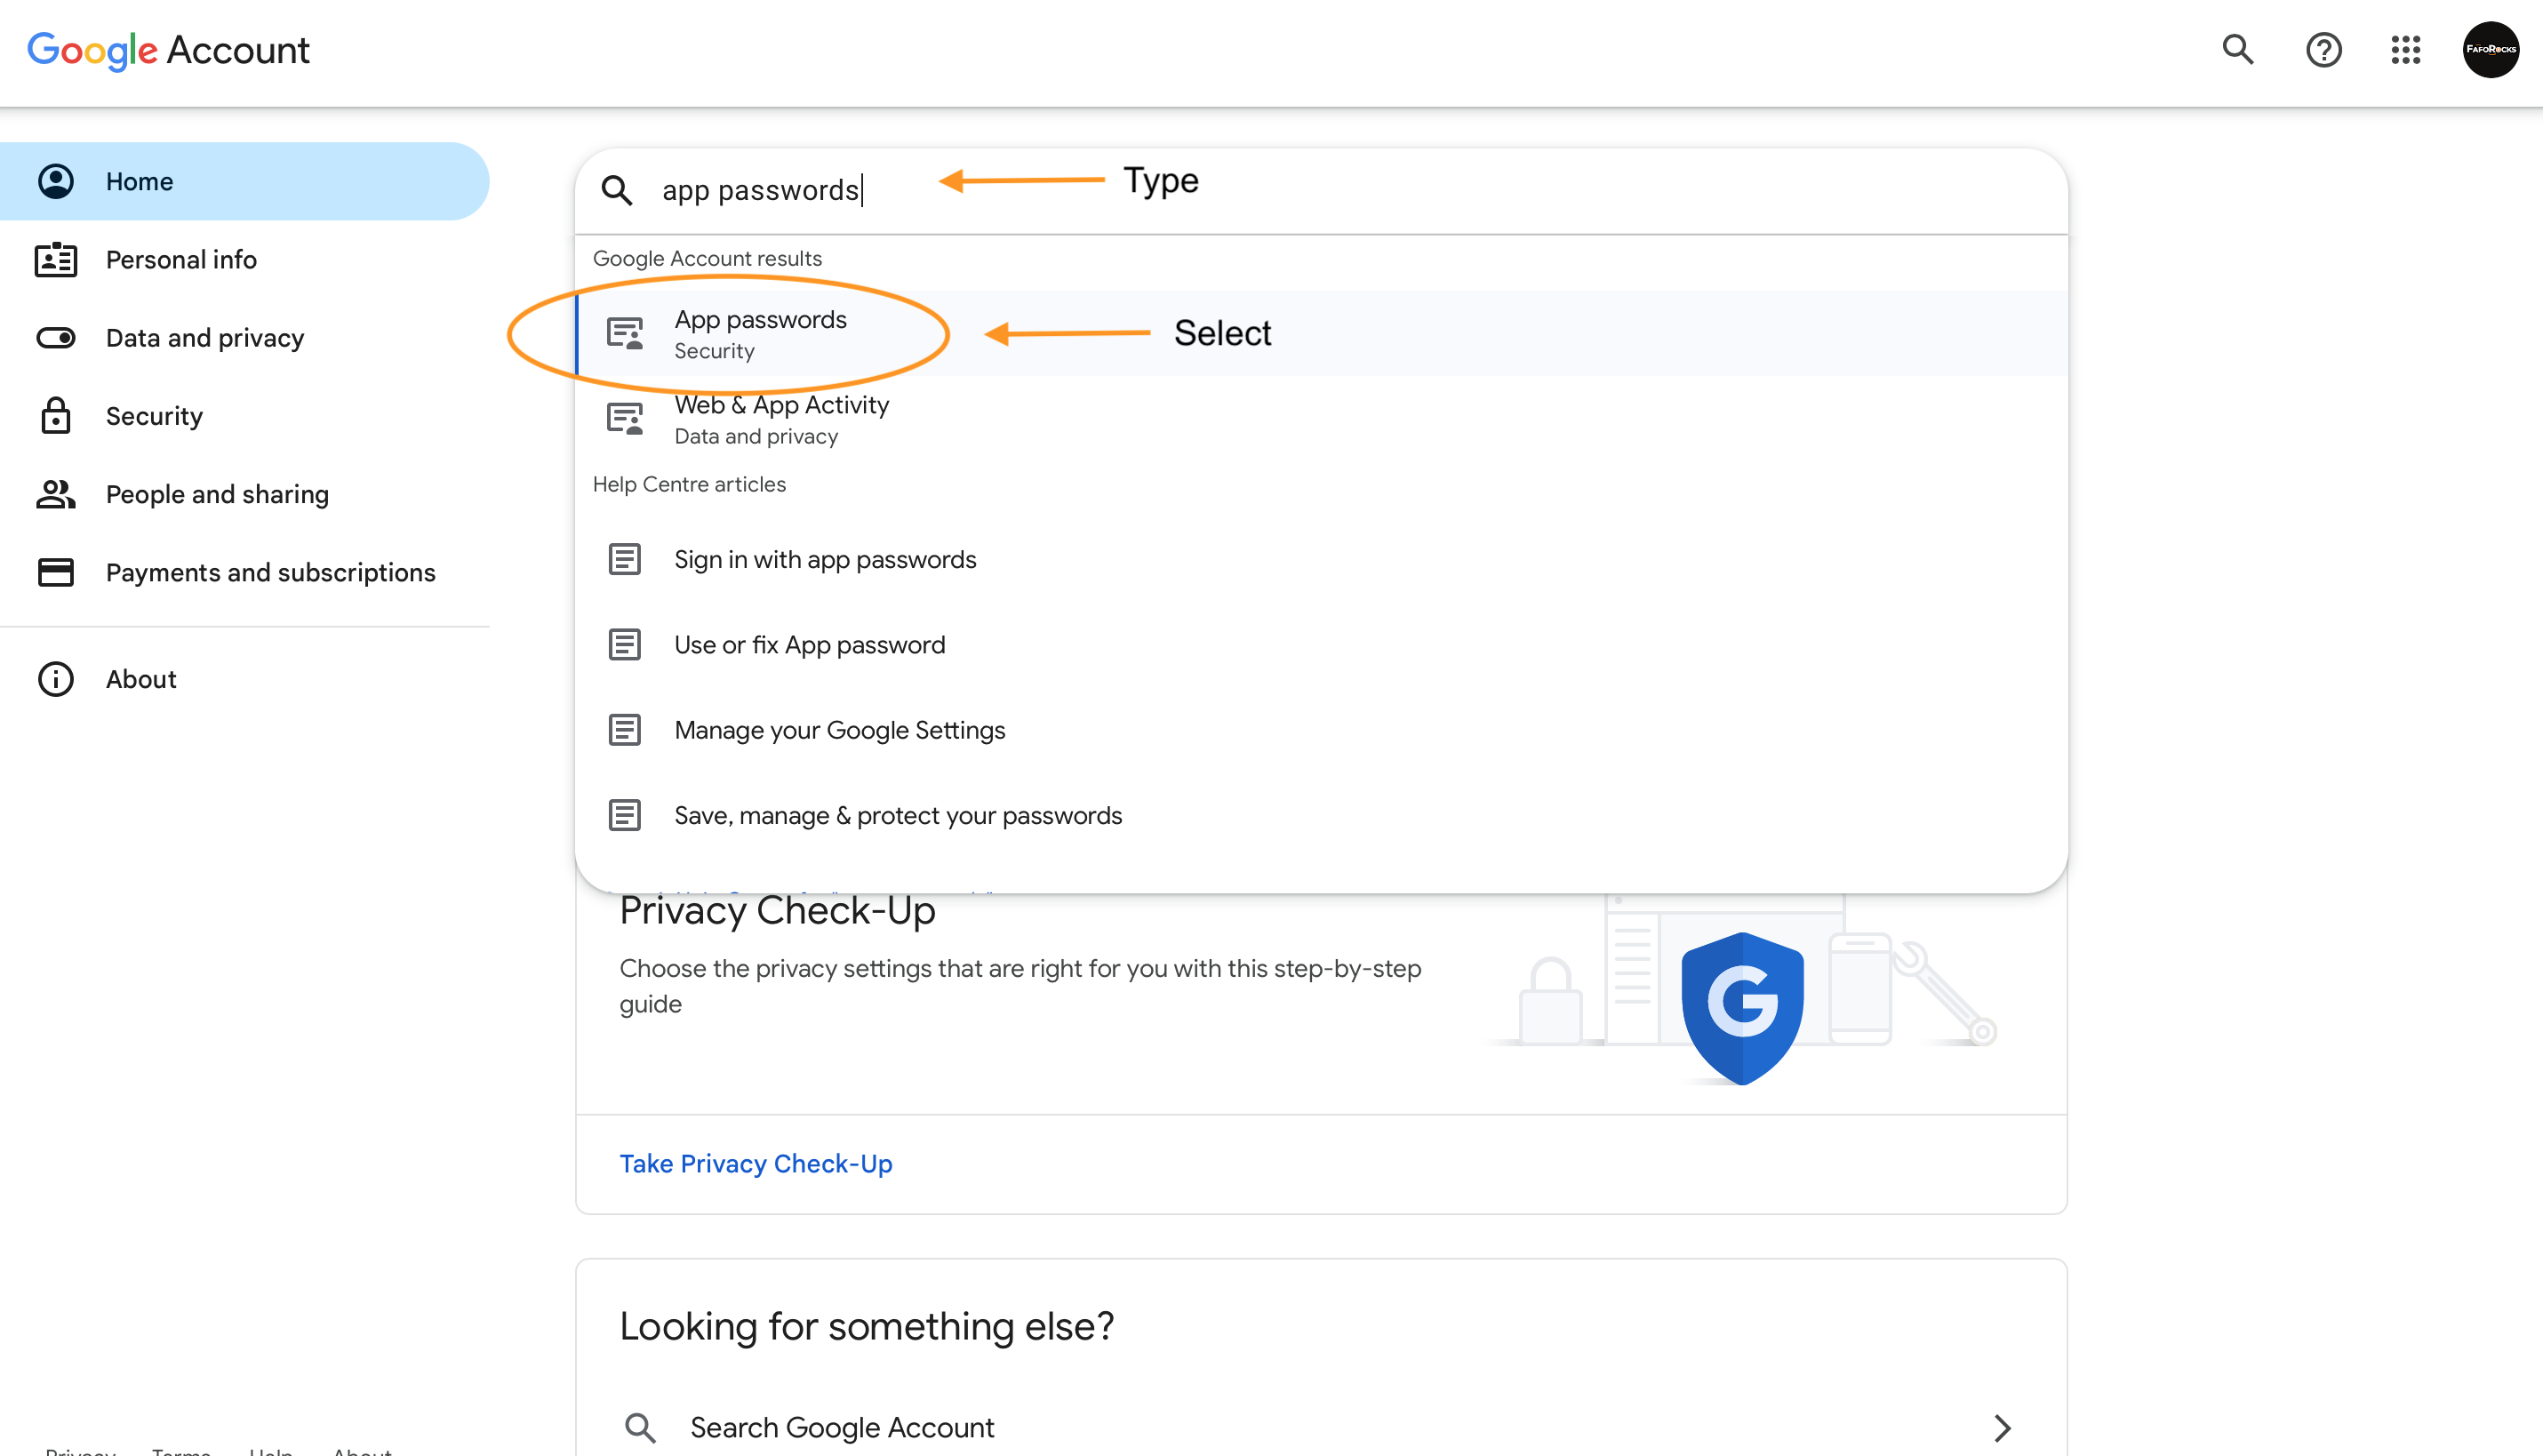
Go to: Google Account Homepage https://myaccount.google.com/
- Within the search bar, type:
App Passwords - Select App Passwords from the drop down search results
Note
ℹ️ To continue, you may need verify it’s you by logging in again
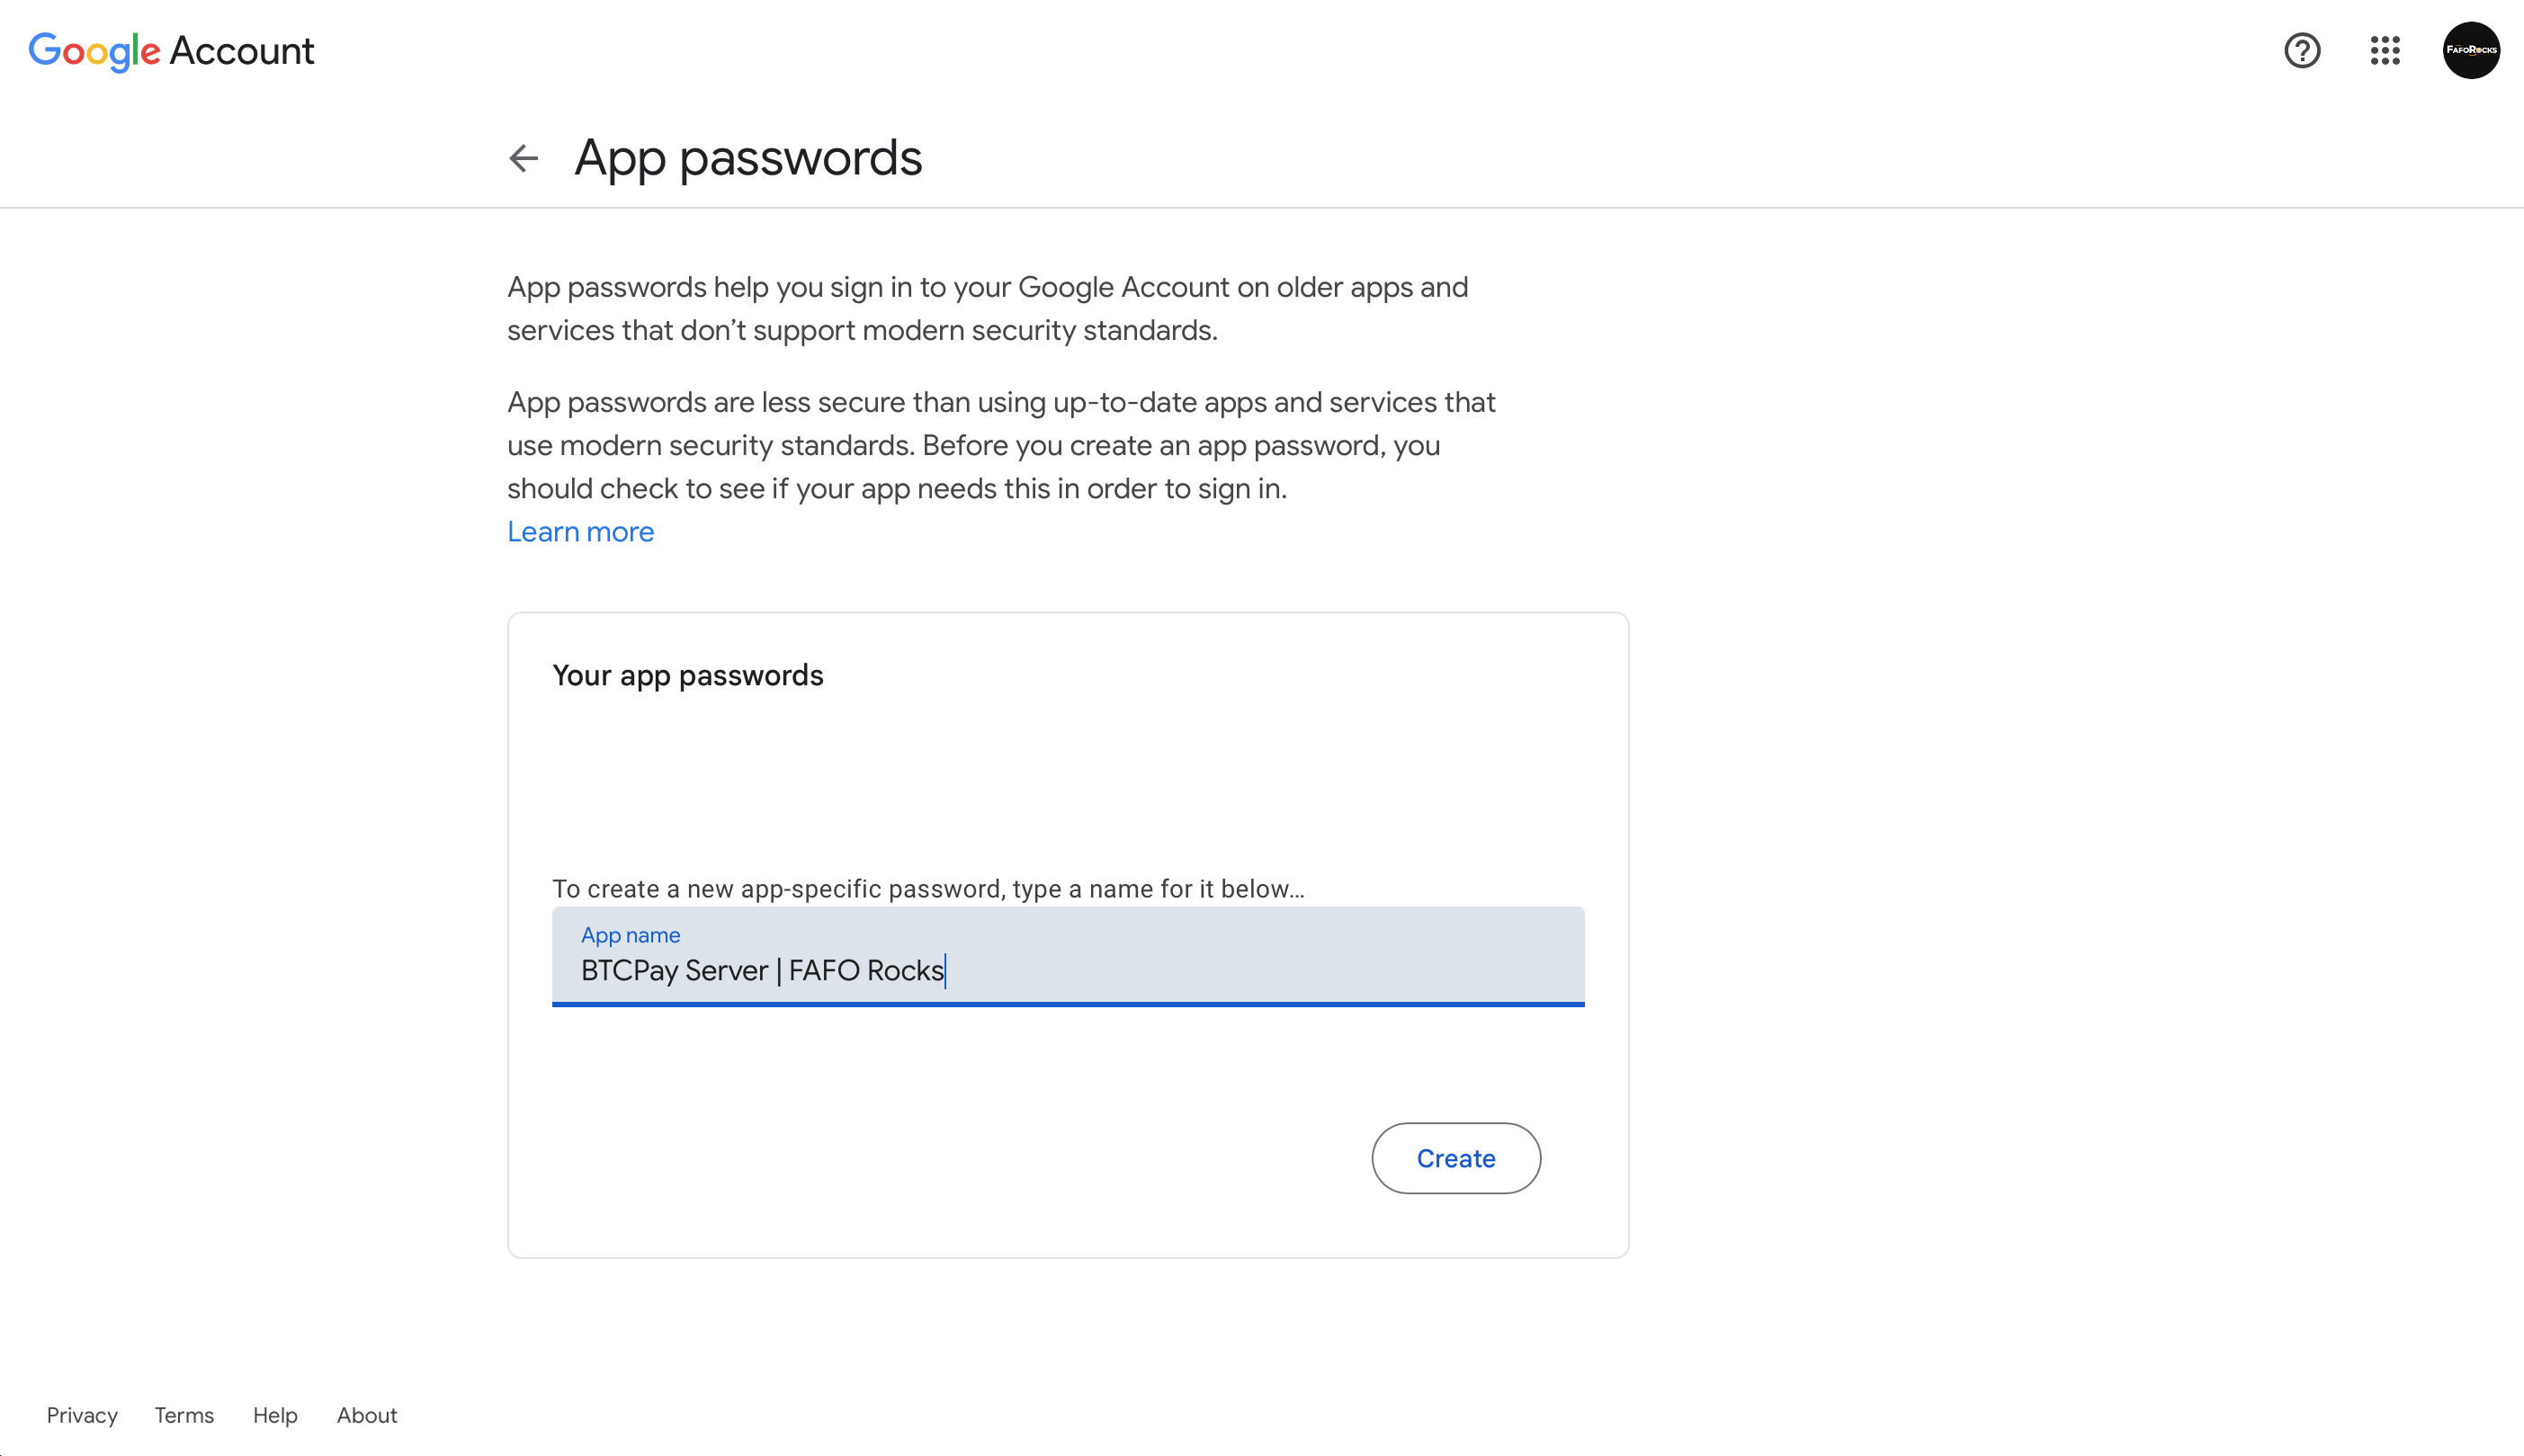
🔸 You should see
App passwords
- App name: enter a name that helps you remember what this app password is used for (e.g., “BTCPay Server + [Point of Sale name]”)
- Click Create
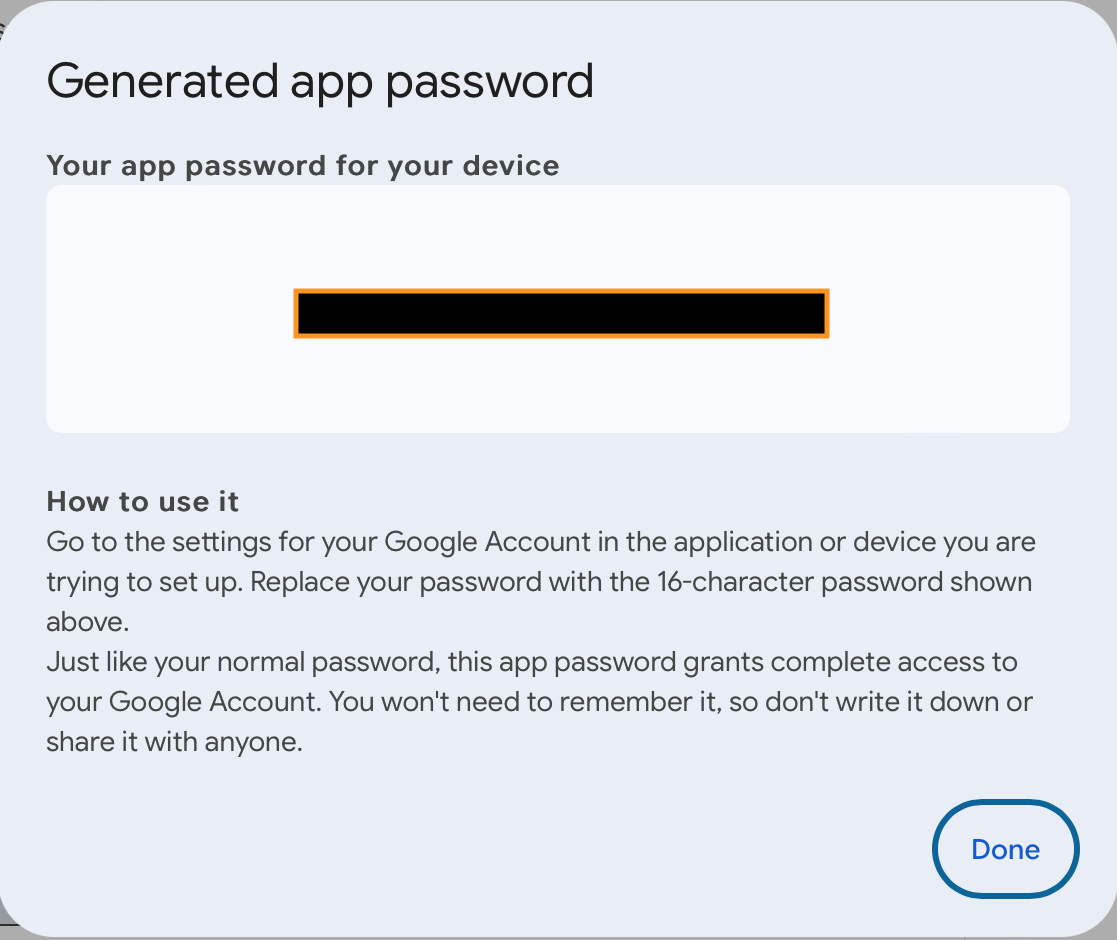
🔸 You should see
Popup with: Generated app password
- Copy and save App password securely
- Once saved, click Done
✅ App password created successfully
Troubleshoot
🛠️ If you’ve set up 2-Step Verification but can’t find the option for app password, it might be because:
- Your Google Account has 2-Step Verification set up only for security keys: in which case try changing your 2FA login options (Step 2)
- Your Google account is brand-new, sometimes it takes a few minutes for app passwords to activate
- You’re logged into a work, school, or another organisation account
- Your Google Account has Advanced Protection. You will need to turn it off and/or unenroll
Important
⚠️ Google revokes your app passwords when you change your Google Account password. To continue to use this setup after changing your Google password, you’ll need to repeat Step 4 and 5.
5. Configure BTCPay Server Email
-
Log in to your BTCPay Store (these guides use Bitcoin Aruba, other hosts may look slightly different).
-
From the sidebar, select your Store. Go to Settings → Email
-
Enter:
- SMTP Server:
smtp.gmail.com - Port:
587 - Sender’s Email: your Gmail address
- Login: your Gmail address
- Password: App Password from Step 4
- SMTP Server:
-
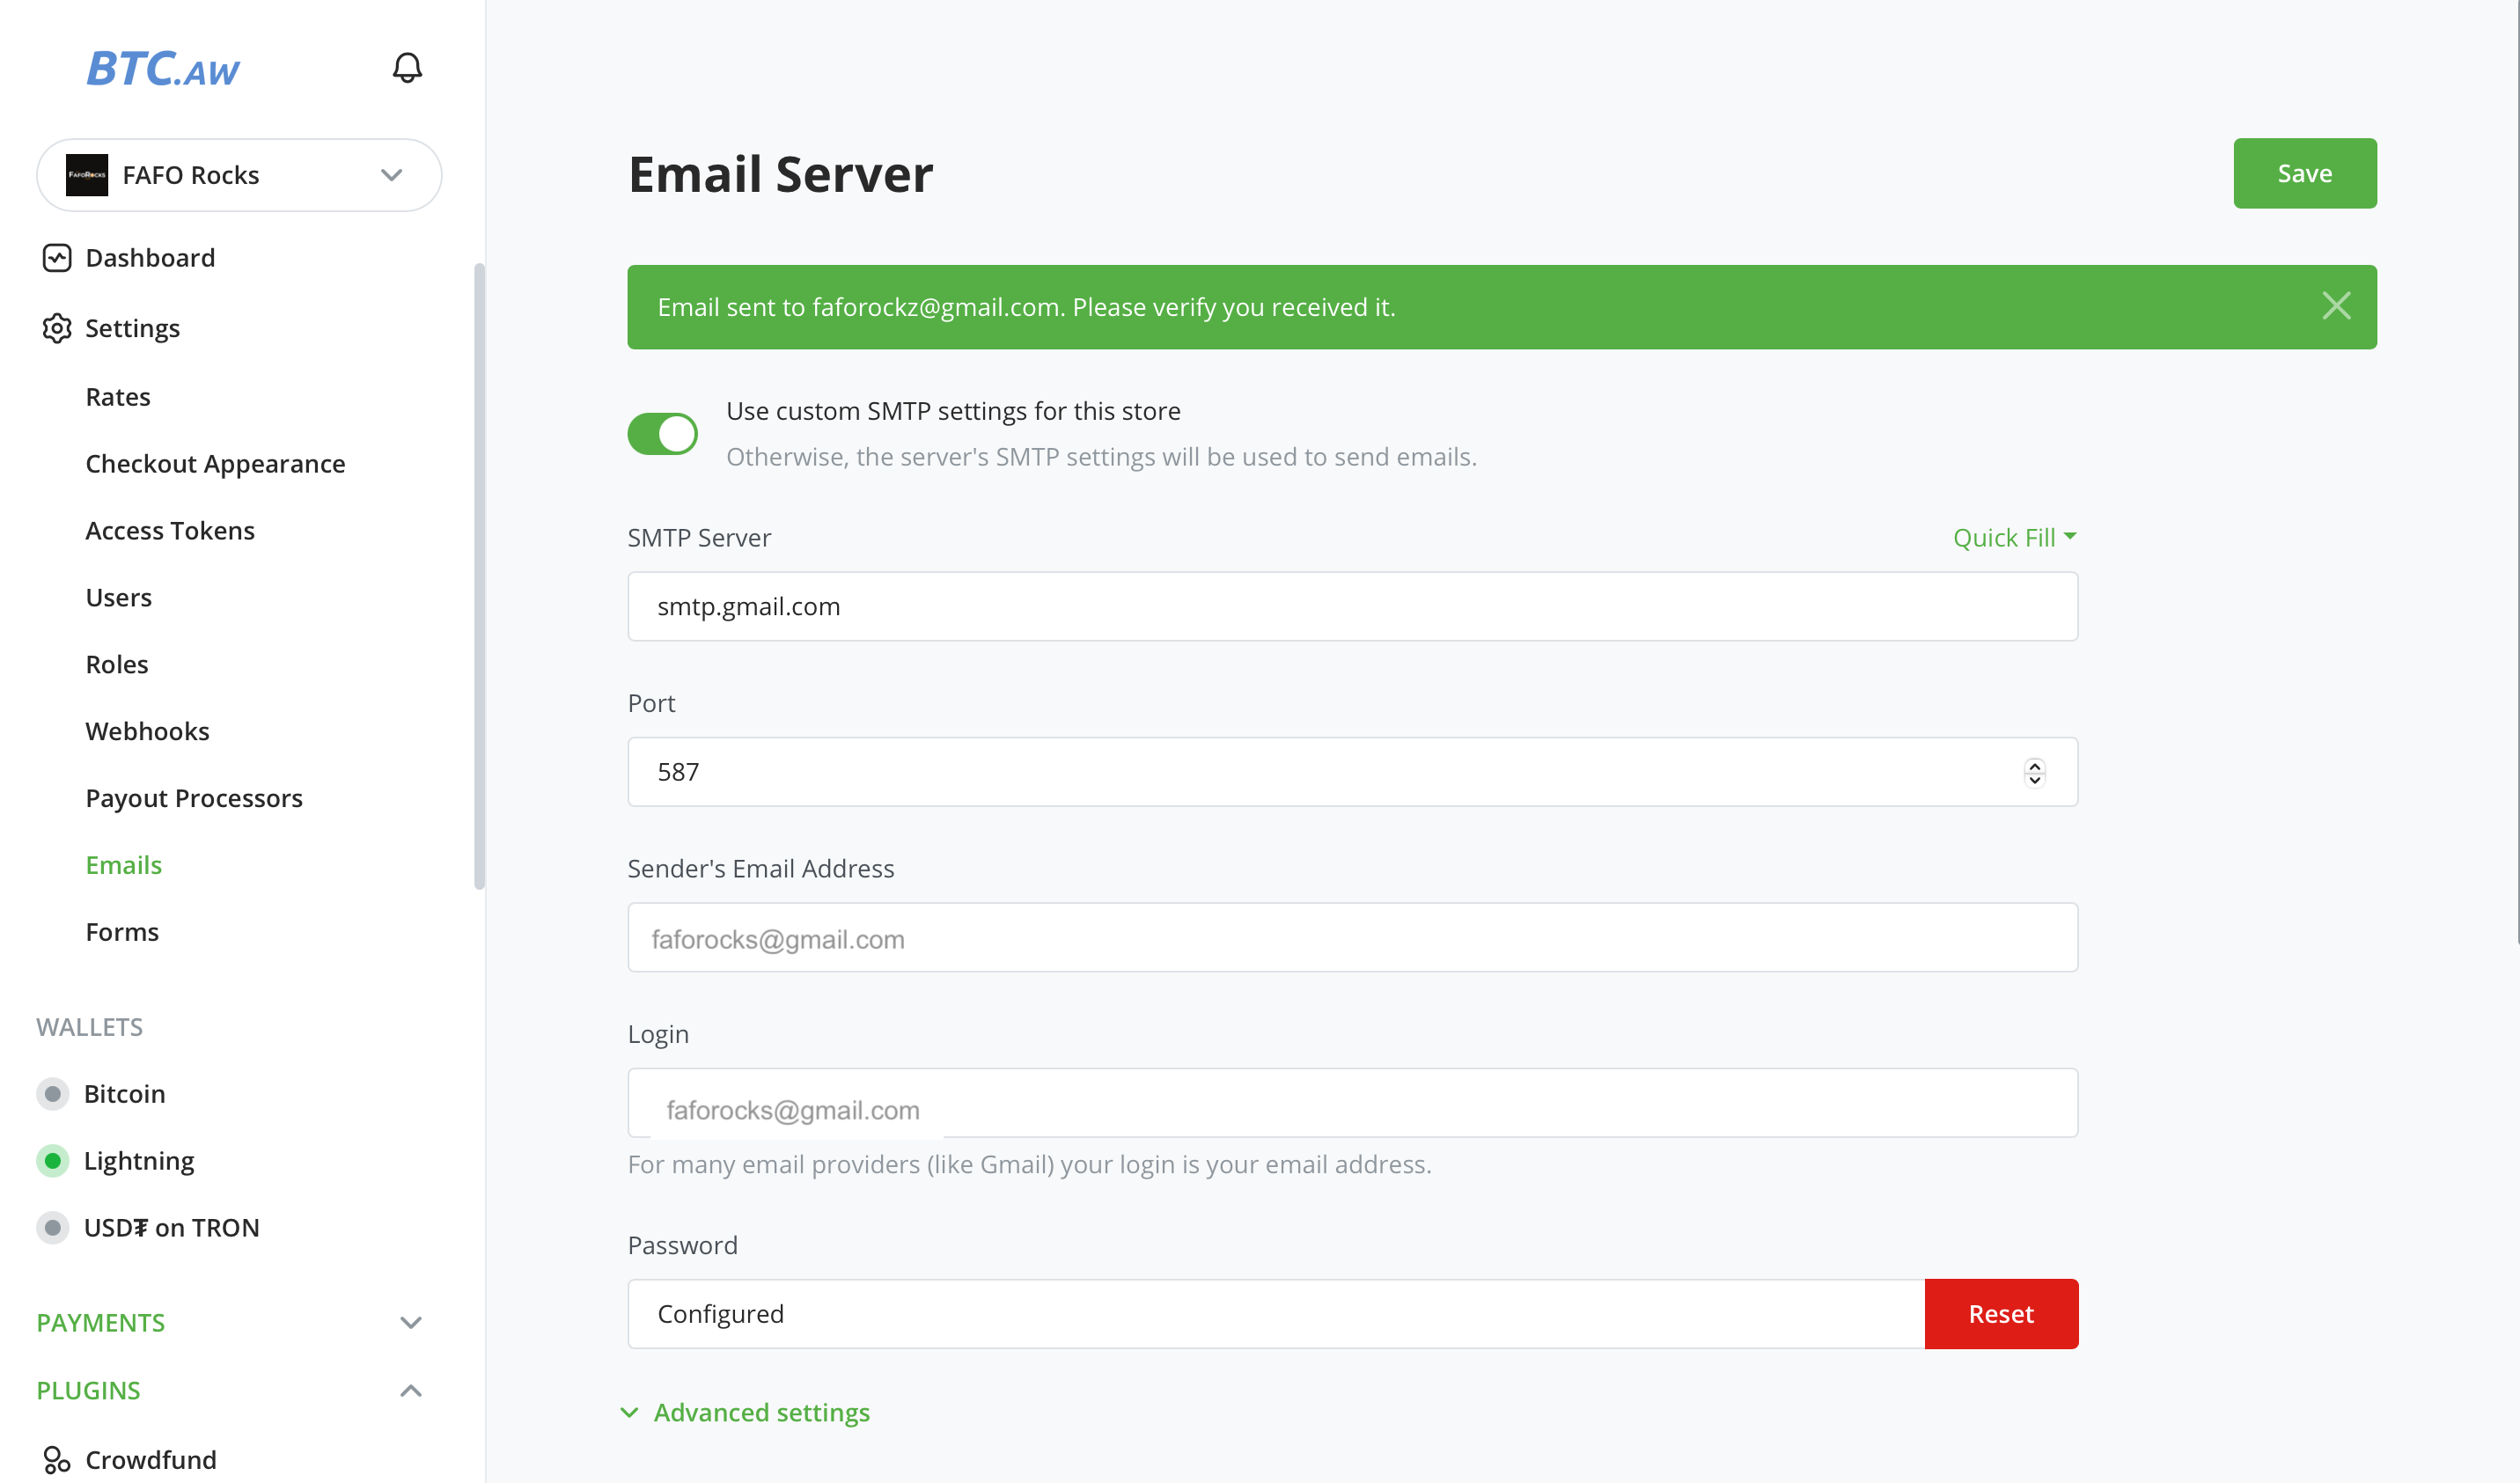
Click Save
🔸 You should see
Password is Configured
✅ BTCPay email server is configured successfully
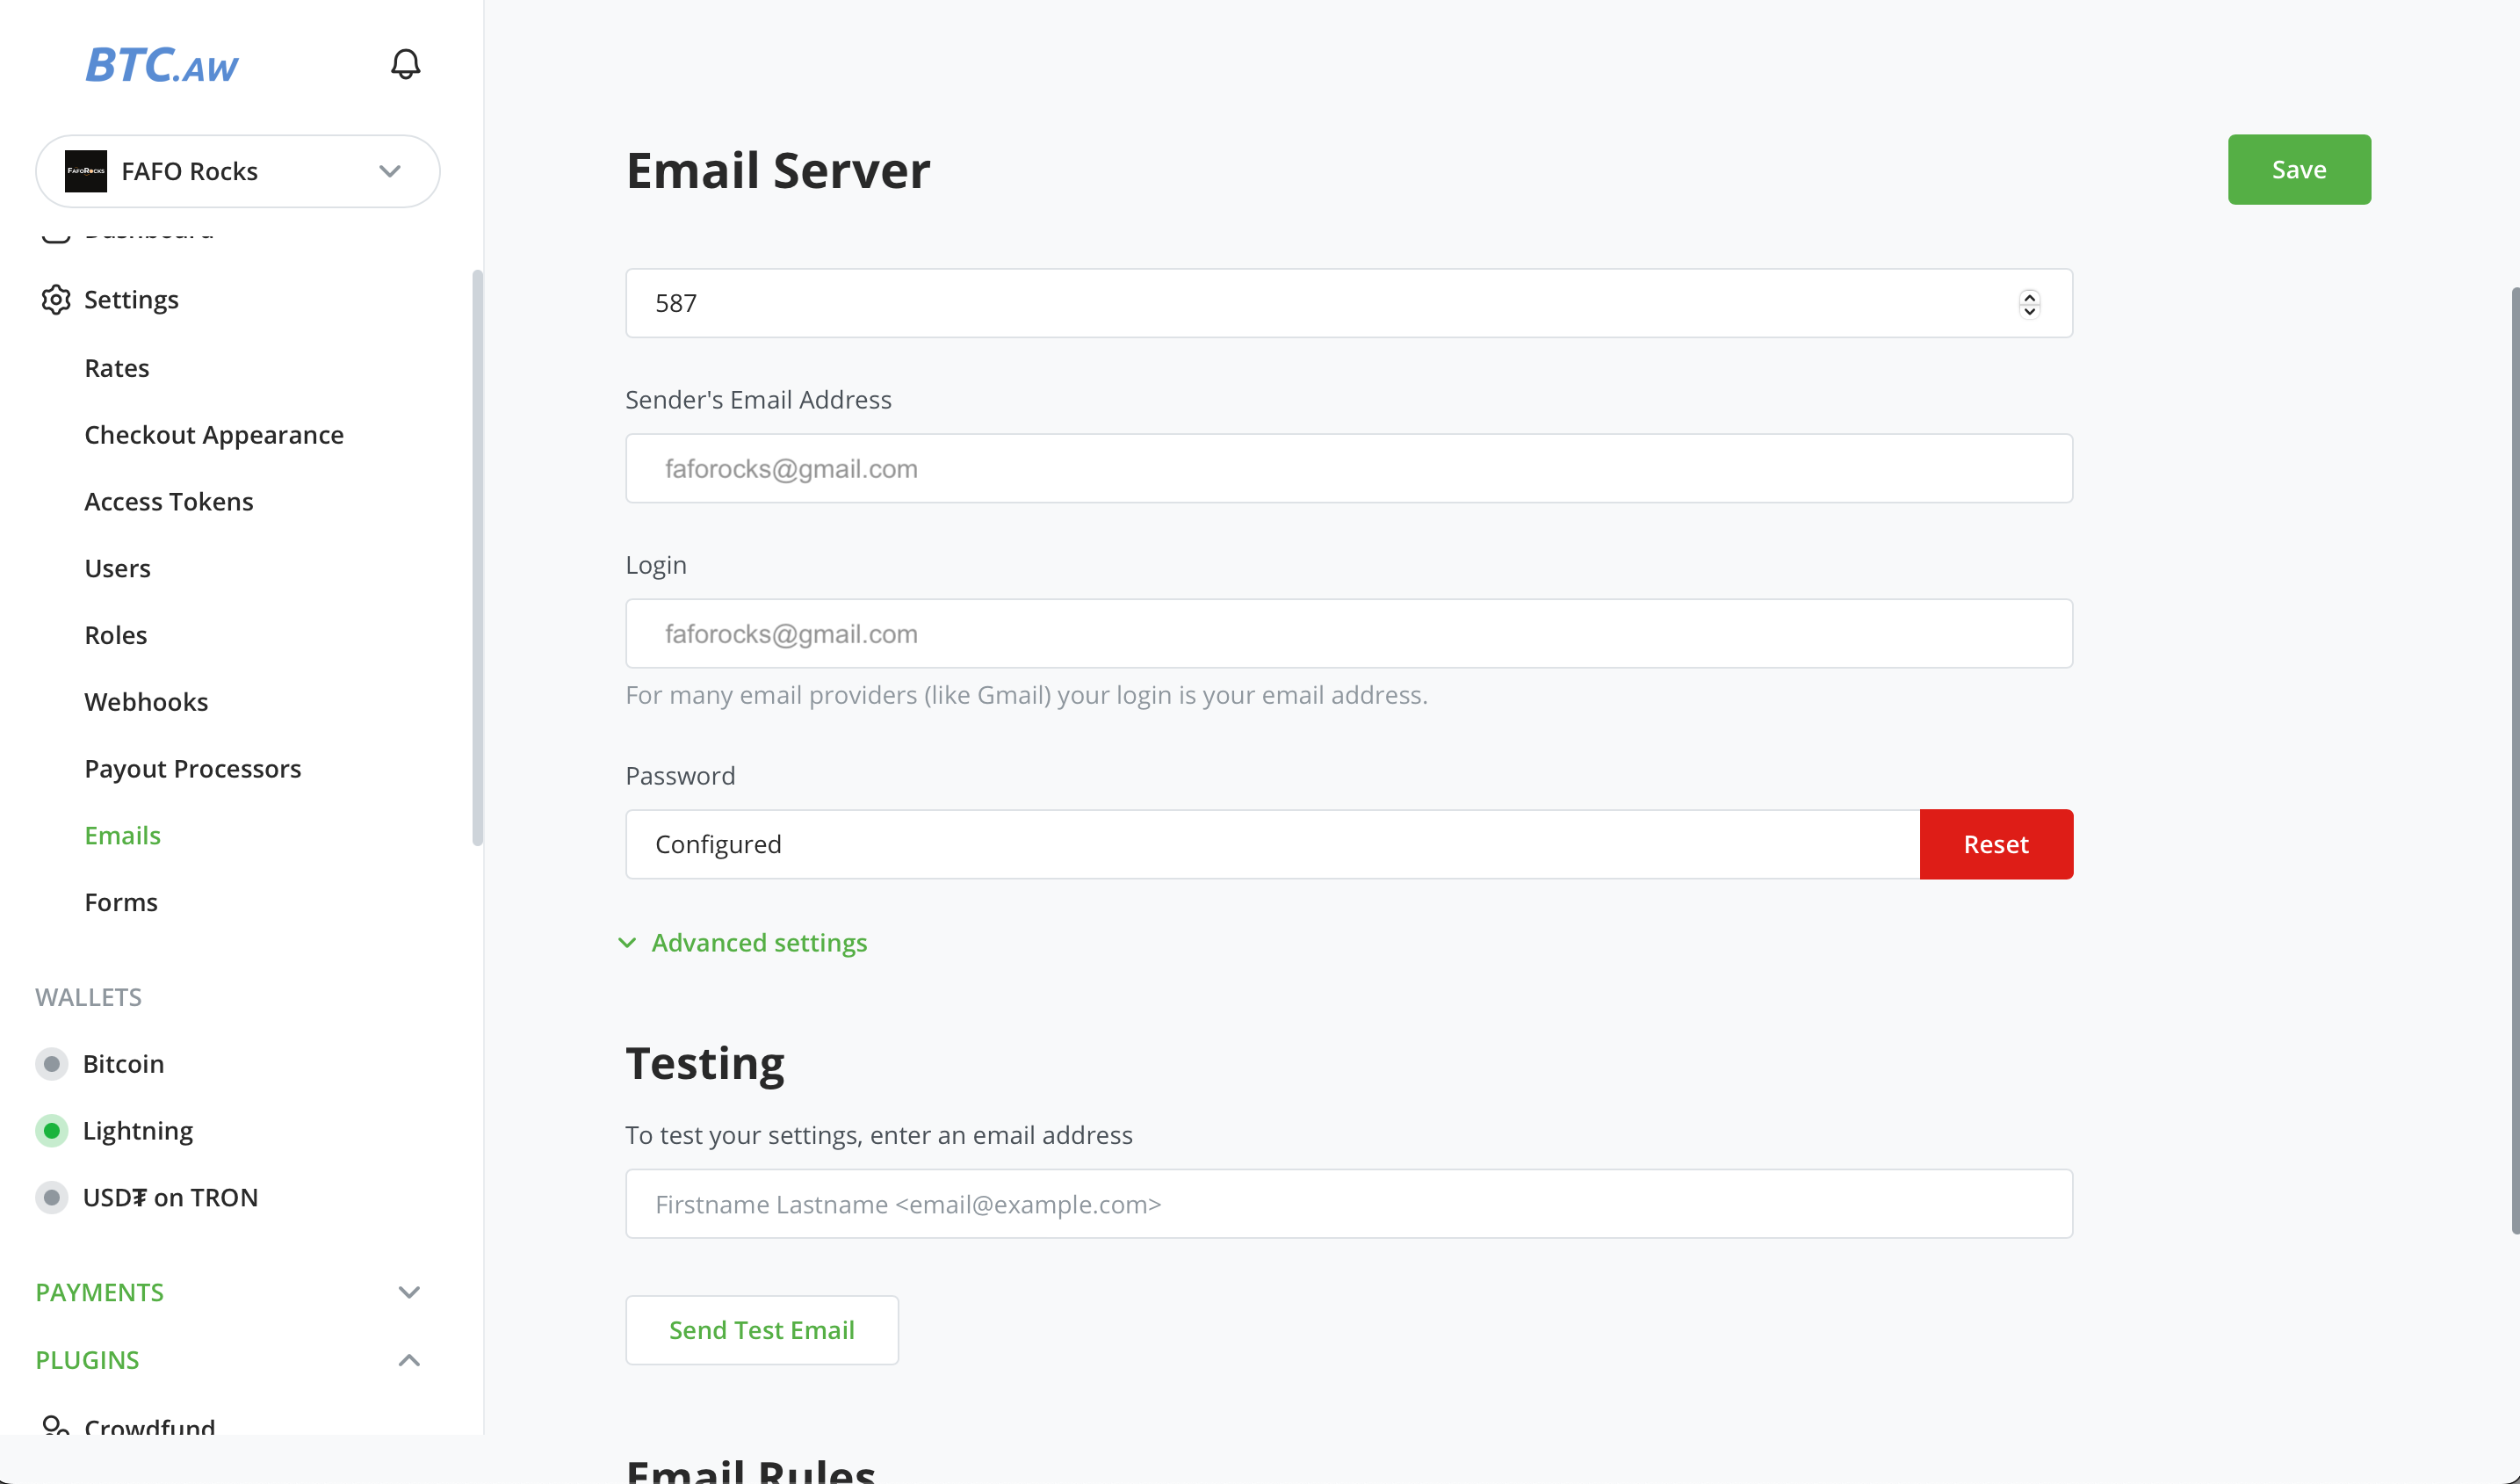
6. Send Test Email
Scroll to Testing
- Enter your Gmail
- Click Send Test Email
🔸 You should see
“Email sent to [Gmail address]. Please verify you received it.”
✅ Test email sent successfully
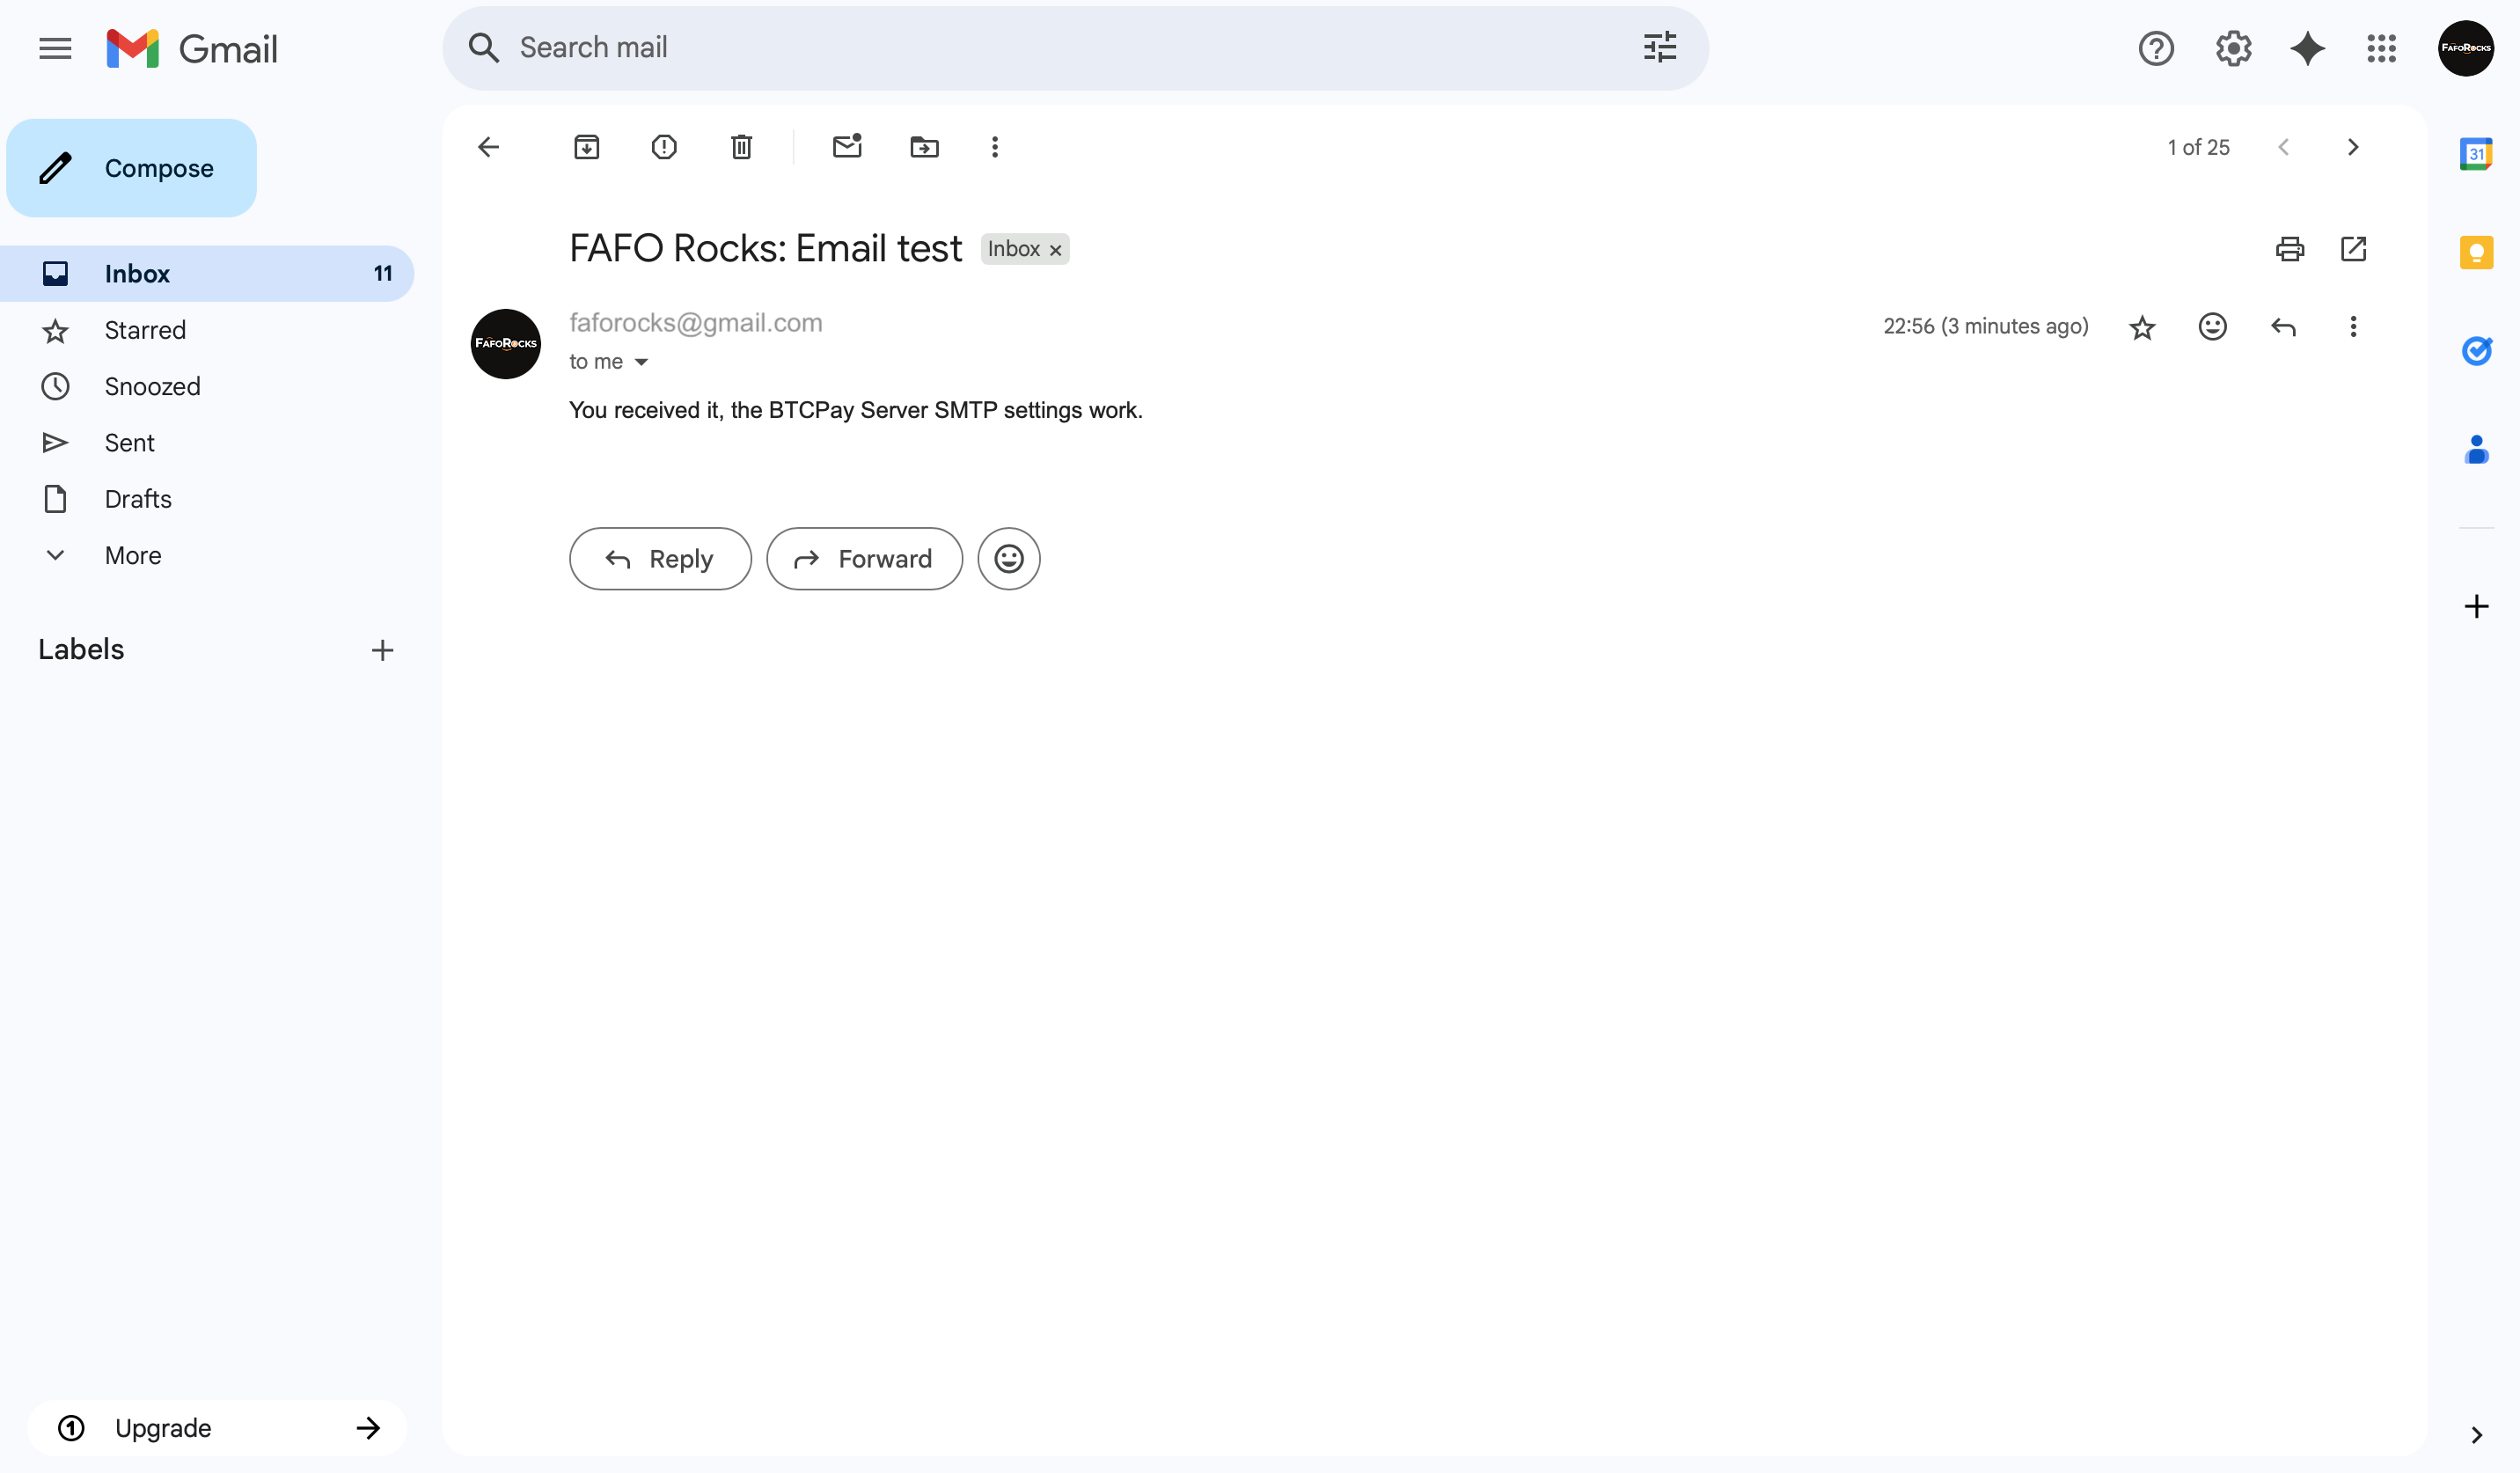
Note
ℹ️ You’ve sent yourself a test email. A new message should appear in your inbox. Check your Sent folder to verify.
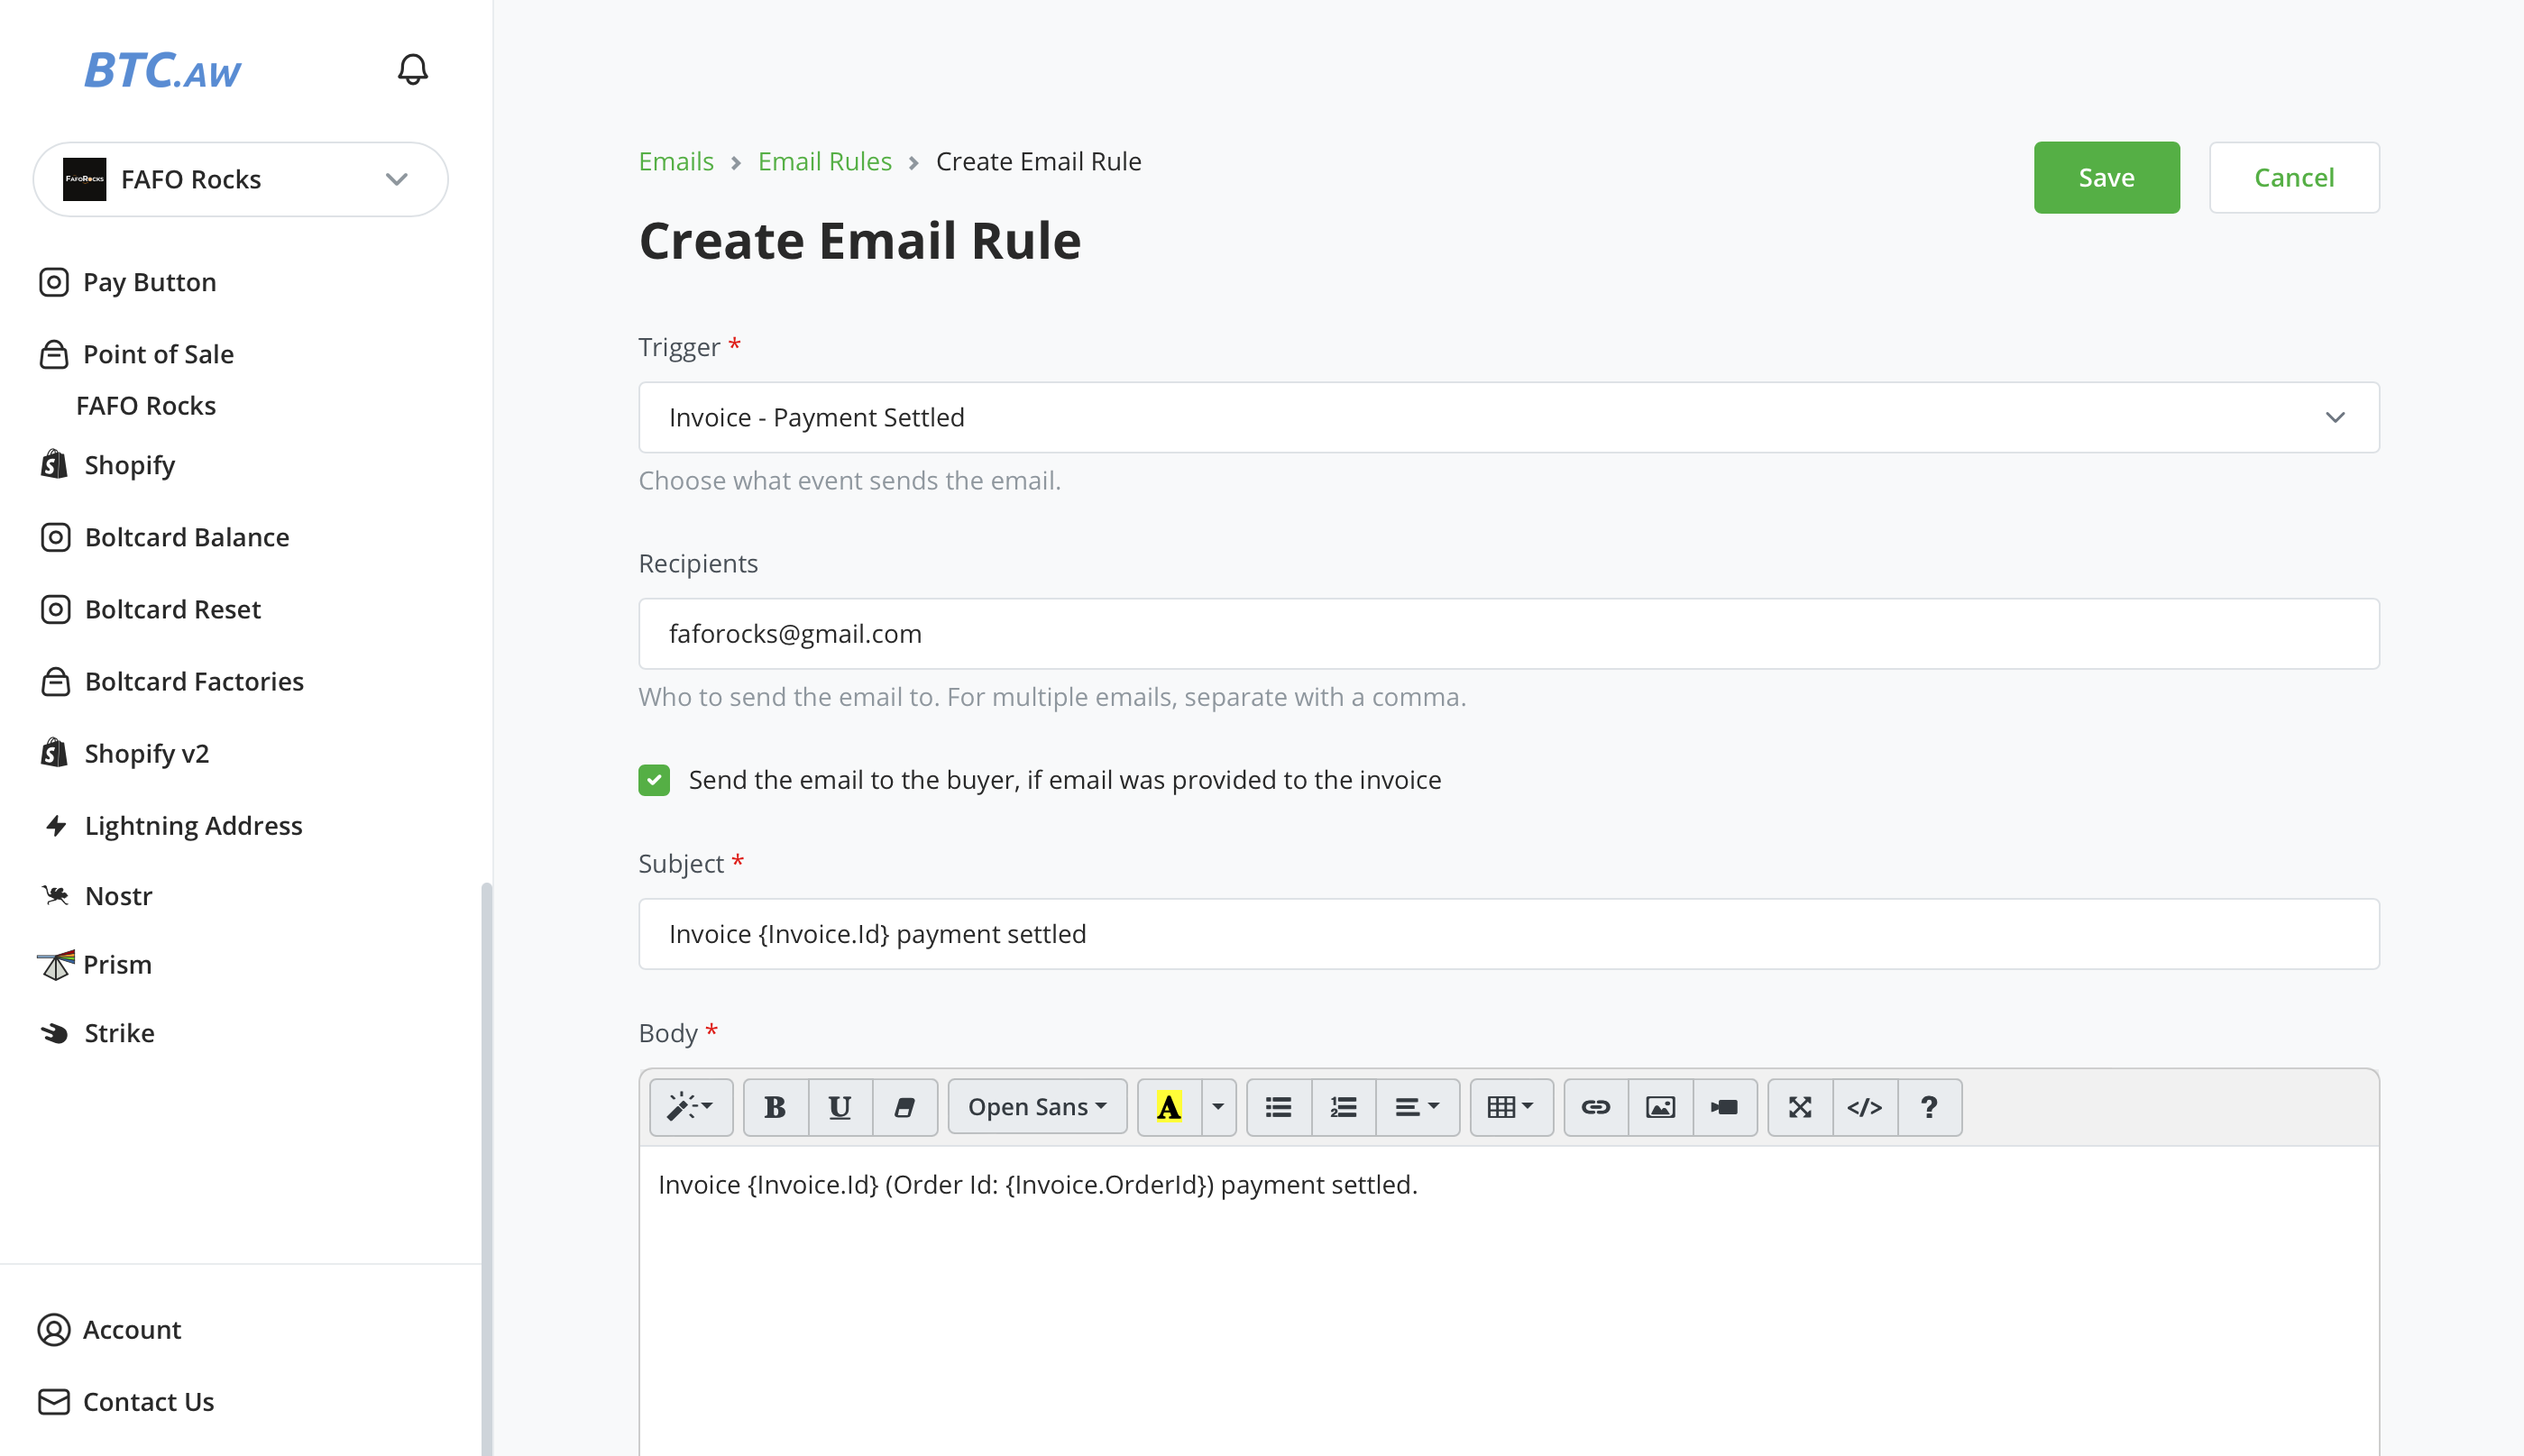
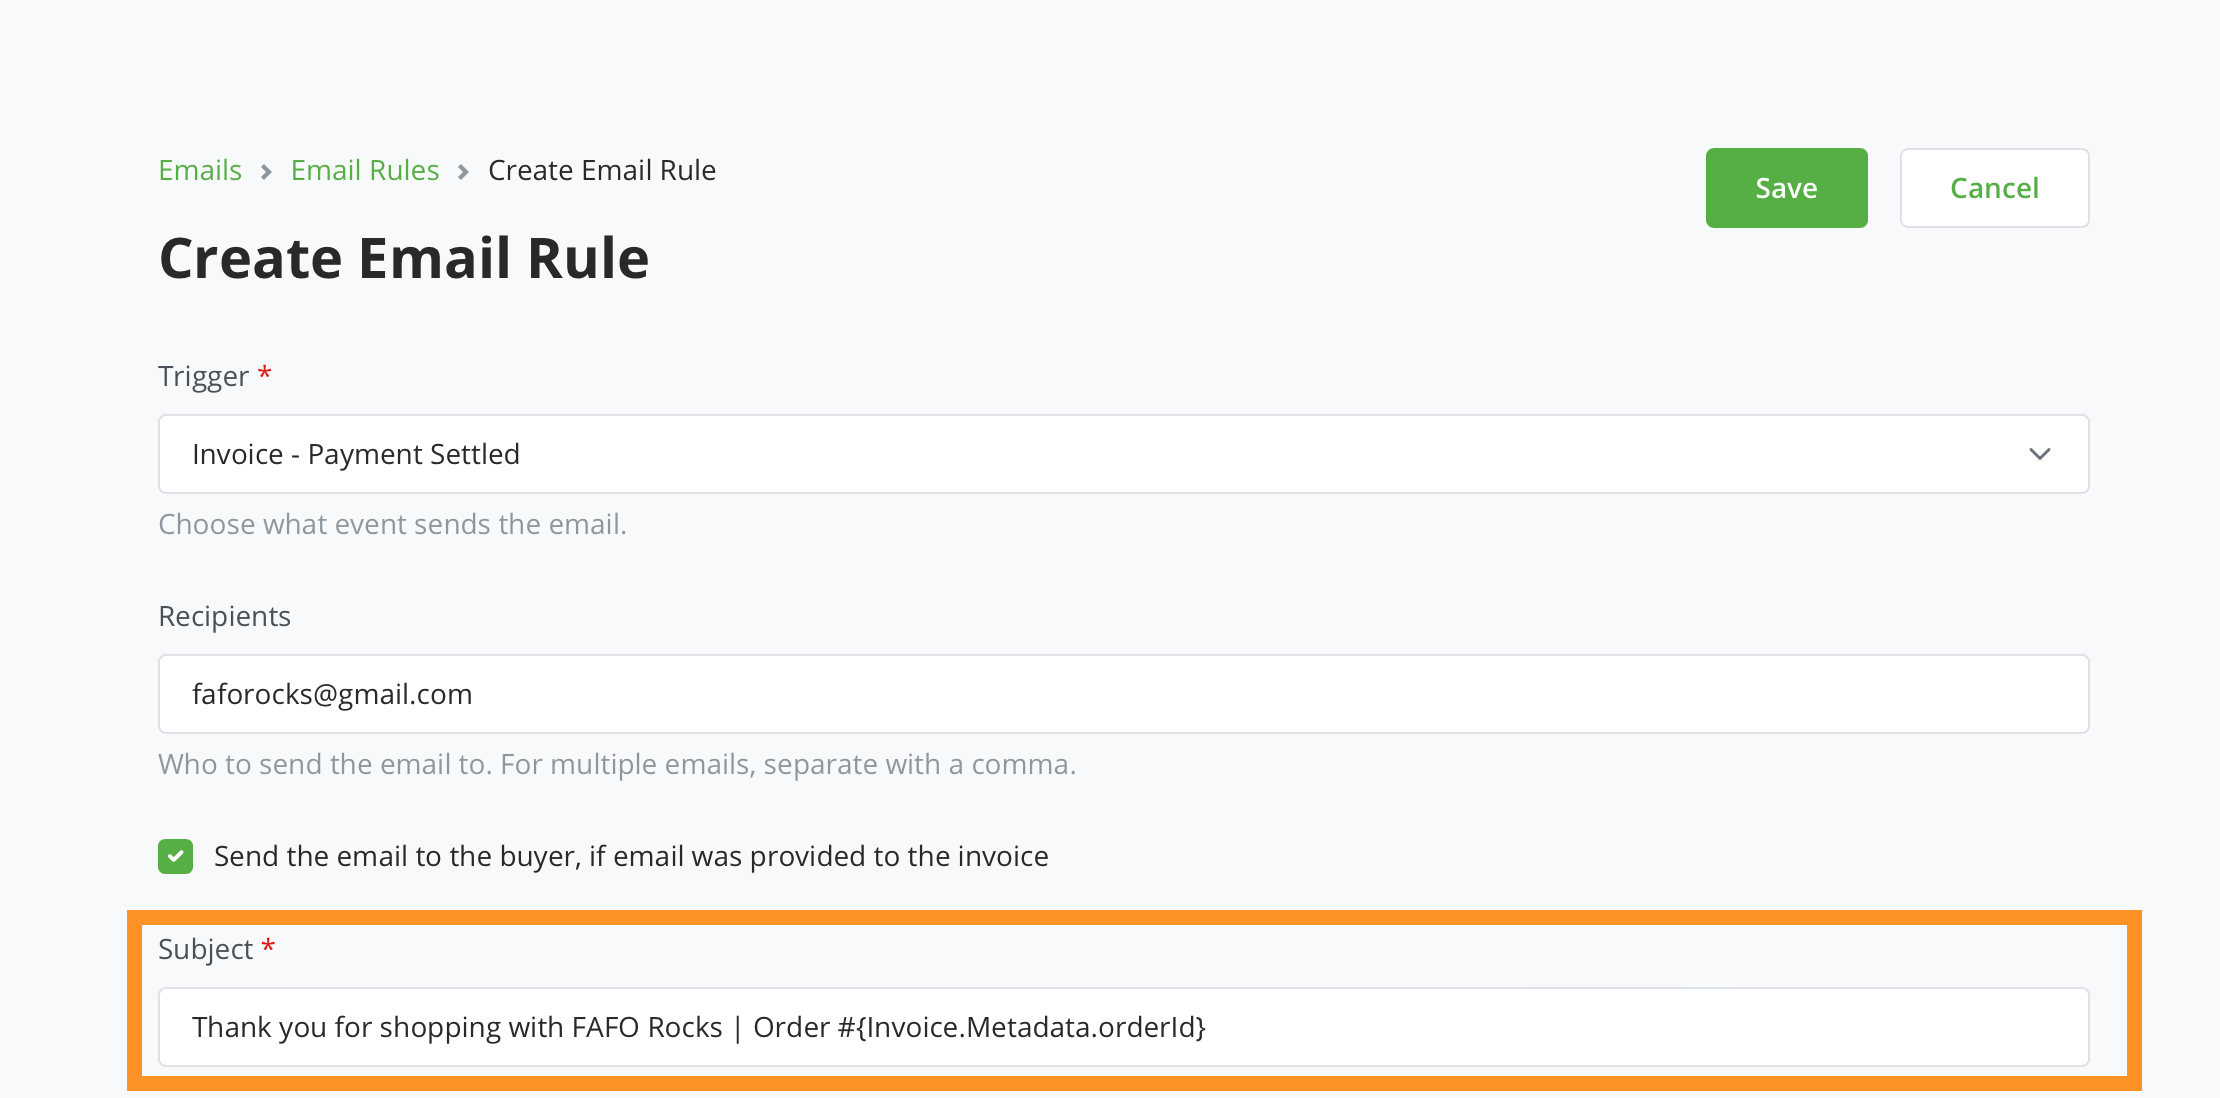
7. Set Up Email Rules for Automated Order Confirmations
Scroll to Email Rules
- Click Configure
Email Rules
-
Click Create Email Rule
-
Trigger: select
Invoice - Payment Settled -
Recipients: Enter the email address where you want to receive order confirmations
-
Send to buyer: Check this to enable
-
The email subject and body is autopopulated.
-
Click Save
✅ Automated order confirmation emails set up successfully
🎉 Congratulations! Customers will now receive automated order confirmation emails! ⚡️
8. Email Templates
Let’s shape how those emails look. Below are ready-to-use templates you can adapt for physical products, digital products, or event tickets.
Note
ℹ️ Only the body of the email varies. All emails can be customized with dynamic fields (e.g., order number, item, buyer name etc).
Paste the following into the Subject field:
Thank you for shopping with [YOUR STORE NAME] | Order #{Invoice.Metadata.orderId}
This will personalize each email subject line with the buyer’s order number.
Important
⚠️ Replace [YOUR STORE NAME] with your actual store name.
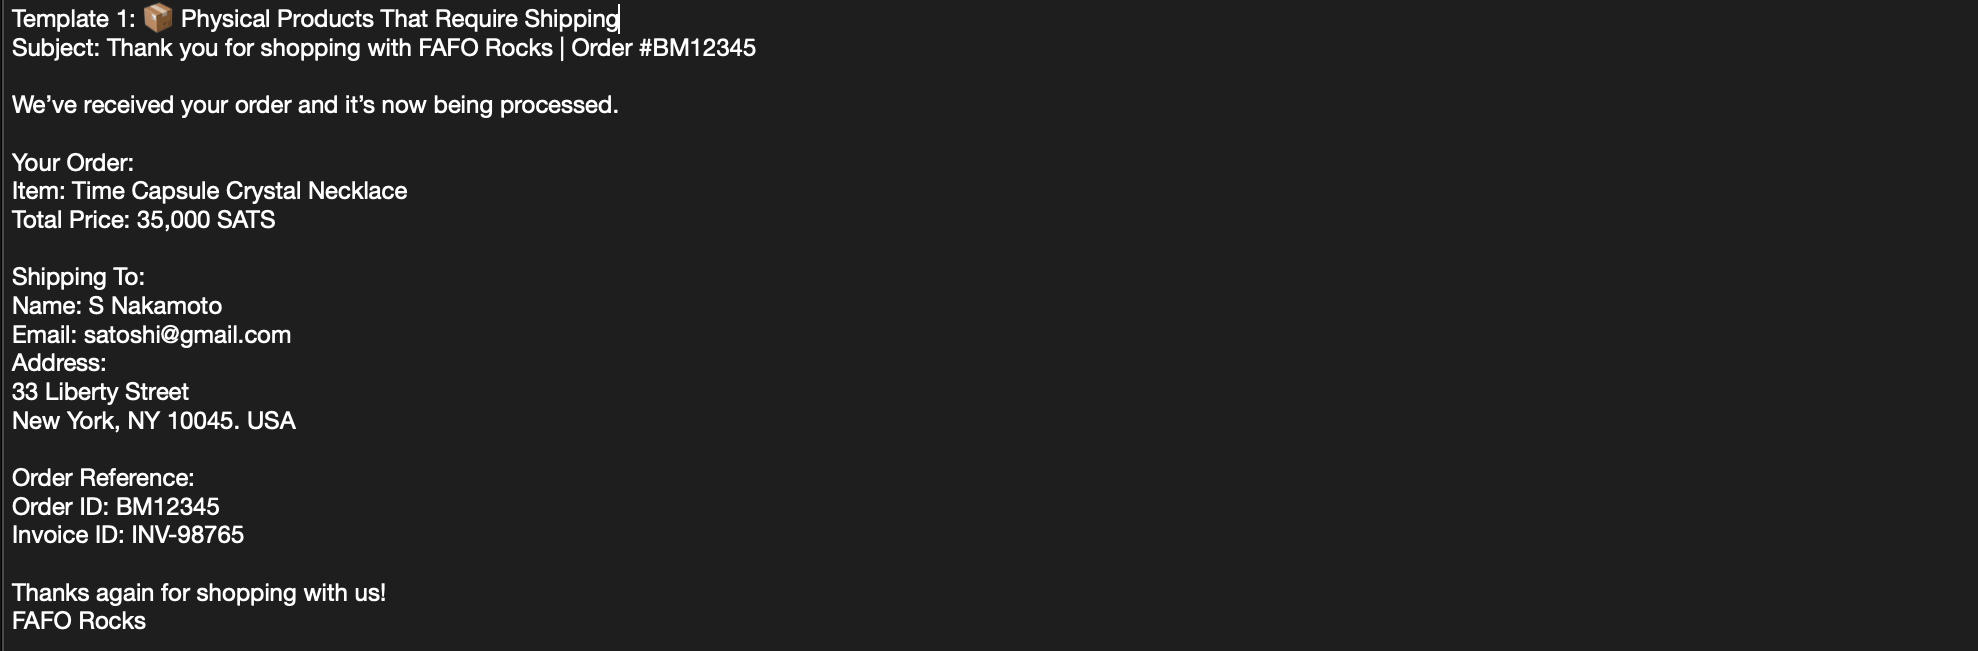
📦 Template 1: Physical Products That Require Shipping
Body:
We’ve received your order and it’s now being processed.

Your Order:
Item: {Invoice.Metadata.itemDesc}
Total Price: {Invoice.Price} {Invoice.Currency}

Shipping To:
Name: {Invoice.Metadata.buyerName}
Email: {Invoice.Metadata.buyerEmail}
Address:
{Invoice.Metadata.buyerAddress1}
{Invoice.Metadata.buyerAddress2}
{Invoice.Metadata.buyerCity}, {Invoice.Metadata.buyerState} {Invoice.Metadata.buyerZip}
{Invoice.Metadata.buyerCountry}

Order Reference:
Order ID: {Invoice.Metadata.orderId}
Invoice ID: {Invoice.Id}

Thanks again for shopping with us!
[YOUR STORE NAME]
Important
⚠️ Replace [YOUR STORE NAME] with your actual store name.
Email example:
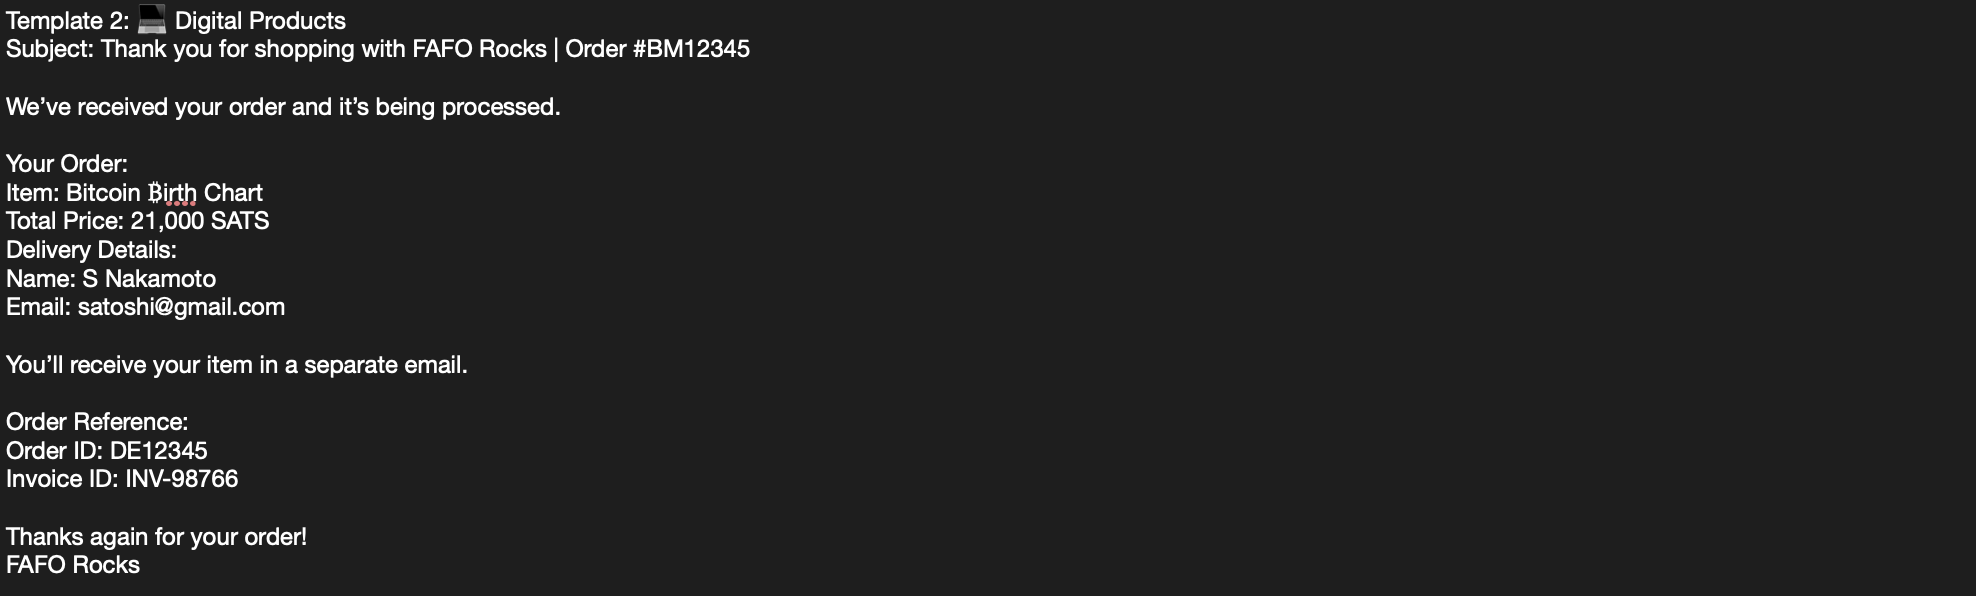
💻 Template 2: Digital Products
Body:
We’ve received your order and it’s being processed.

Your Order:
Item: {Invoice.Metadata.itemDesc}
Total Price: {Invoice.Price} {Invoice.Currency}
Delivery Details:
Name: {Invoice.Metadata.buyerName}
Email: {Invoice.Metadata.buyerEmail}

You’ll receive your item in a separate email.

Order Reference:
Order ID: {Invoice.Metadata.orderId}
Invoice ID: {Invoice.Id}

Thanks again for your order!
[YOUR STORE NAME]
Important
⚠️ Replace [YOUR STORE NAME] with your actual store name.
Email example:
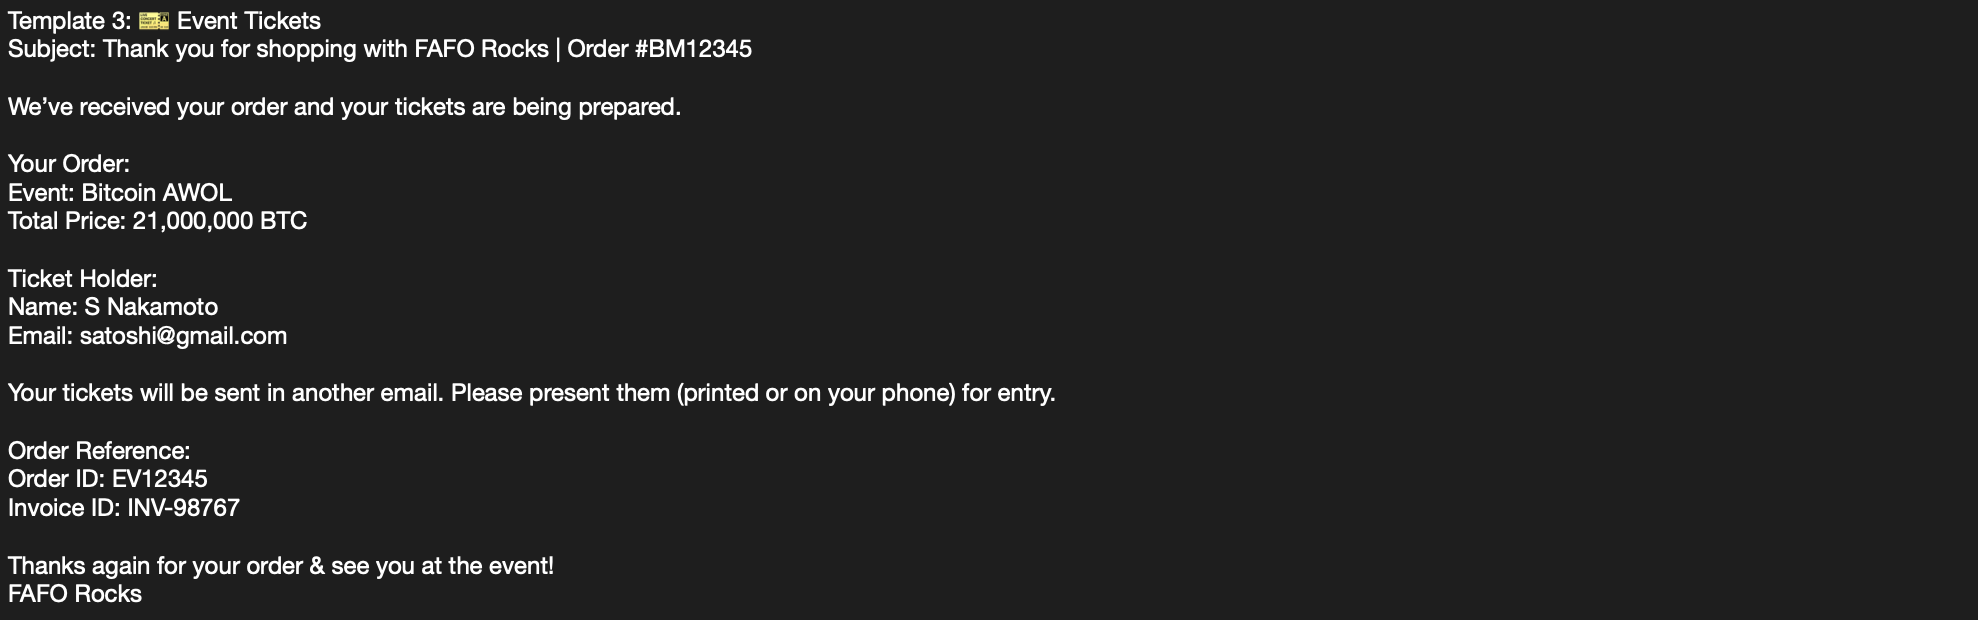
🎫 Template 3: Event Tickets
Body:
We’ve received your order and your tickets are being prepared.

Your Order:
Event: {Invoice.Metadata.itemDesc}
Total Price: {Invoice.Price} {Invoice.Currency}

Ticket Holder:
Name: {Invoice.Metadata.buyerName}
Email: {Invoice.Metadata.buyerEmail}

Your tickets will be sent in another email. Please present them (printed or on your phone) for entry.

Order Reference:
Order ID: {Invoice.Metadata.orderId}
Invoice ID: {Invoice.Id}
Thanks again for your order & see you at the event!
[YOUR STORE NAME]
Important
⚠️ Replace [YOUR STORE NAME] with your actual store name.
Email example:
9. Test Automation
- Place a test order
- Confirm the automated email is sent to a) your email AND b) recipients email you entered at checkout
- Verify a) subject, b) body, and c) dynamic fields populate correctly. Amend if required
✅ Automated order confirmation emails sent successfully
Next Steps
- Customize your emails further: improve copy, add logo, brand colors, social links etc.
- Add conditional logic to send different emails based on product type when you sell a combination of physical goods, digital items, and/or event tickets. (Guide in progress.)
Heads Up
- Gmail is custodial and permissioned, not open-source, does censor content, and can analyze your emails. For maximum privacy, consider self-hosted alternatives.
✨ Big Thanks
Shout out to the free, and open-source bitcoin projects and communities that make it possible to just do things:
BTCPay Server
- Website: btcpayserver.org
- X: @BtcpayServer
- Nostr: @btcpayserver
Bitcoin Aruba
- Website: btc.aw
- X: @BitcoinAruba
- Nostr: @BitcoinAruba
Cyphermunk House
- Website: cyphermunkhouse.com
- Nostr: @CYPHERMUNK HOUSE | LONDON
Without their work, tools in this guide wouldn’t exist. Support them, contribute if you can, and share what you build.
This is the second guide by FAFO Rocks to help merchants accept bitcoin payments with less friction. It’s part of a growing series that will keep evolving as we learn in practice, we aim to cover things like on-chain payments, conditional logic email automation, and more.
Part 1
- Beginner’s Guide to Create a Bitcoin Store and Accept Lightning Payments https://yakihonne.com/article/faforocks@zaps.lol/qzBclPt2CBCLD3JgPu_Yl
Connect with us to share feedback, suggest improvements, or follow along as new guides are released.
FAFO Rocks
- Website: tinyurl.com/FAFO-Rocks
- X: @FAFORocks21
- Nostr: @FAFORocks
⚡️ Made Possible by Free, Open-Source Bitcoin Projects 🔥

Thanks for reading! Keep stacking, keep learning, keep sharing, and keep building.
Write a comment